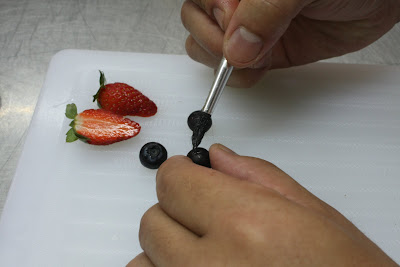
Almost a month I have not update this blog. Too busy with the teaching choas and some personal matter. I promised myself no matter how I have got to find some time to update my blog. So, today, after completing the seminar with e-pjj students, I hurrily went up to my room and update my blog............................here are some of the photo during the seminar.
We do offers food styling and photography workshop training and services:food styling and photography for menu and menu design, advertisement, packaging and any food related photography. Other services includes menu / recipes / product development,product review, menu planning, menu design, menu consultation, product packaging and design. We offers you an affordable food photography at your place (restaurant). We can help you to transform your food into high quality delicious looking photograph.
Friday, February 26, 2010
Wednesday, January 27, 2010
More fake ice cream.........for your eyes only
Last tuesday I did a job for DIGI through Untold Images, they wanted me to do a 5'tiers mock ice cream on a cone for their ads. It was great........ meeting all the creative peoples in the field. I havent got a chance to really snap the picture properly. I did takes some shot but it not the quality I expect, since I did it in hurry without proper set-up. However here are some shot that I want to share with you. This guy is only a side kick not the main hero.
I did not manage to snap the final product with all the topping and dressing, so I let it to your imagination.
Thursday, January 21, 2010
How to Make an Inexpensive Light Tent box– DIY
This is another DIY project to make a light tent box, simple, inexpensive and practical. As mentioned in my last posting, you can easily buy it from any photography accessories shop, however the price sometime look ridiculously expensive for something that look simple. So, let do it ourself. So, what you need for this project? Below is list of thing you might need to made a light tent box:


1. 6 pcs of white colored peforated board size: 2' x 2' - you can get this in almost stationary store, they come in various color - cost around RM6.50 - 7.00.
2. 12 sets of Zipcro locking strap self adhesive - 3" each - you have to shop around, IKEA, Hardware, Stationary Store or in my case I got it from Cash Converter - cost me RM2.50 for a set of 4). Overall cost to do this project is around RM52.00. It really cheap compare if you have to pay RM250.00 at a Photography accessories shop.
That all what you need, the rest it, is your creativity. Why I used zipcro? Because it can easily dismantle for storing as well as carrying them around. Here are the DIY Light Tent Box.
Wednesday, January 20, 2010
The DIY Project
As promised here are the pictures of the DIY project for a light box.


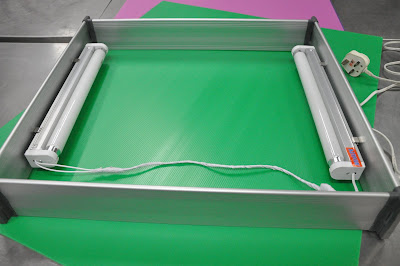
The frame for the light box are made of aluminum, choose this because it is a durable material, in fact they does not look cheap. Where I get it? You need to shop around to find it or specifically go to IKEA look for the kitchen's cabinet drawer organizer that made of aluminum. You need two sets of them. Dimension? not very sure the accurate measurement, I guess it is around 16'' each, so you will get a light box of 16'' X 16'' dimension. You need to do some modification at the end of the aluminum plate so it can be assemble interlocked to resemble a square box. Please look at the end of the aluminum plate (picture above). it come together with the drawer organizer.
For the fluorescent bulb set get it from ACE Hardware at IKANO. It came complete with the bracket. Here is where your knowledge on electrical is needed. A simple one..............do a parallel connection. Before that, screw the bracket onto the aluminum frame to secure the bulb (refer to picture above).
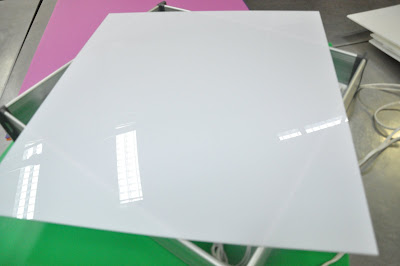
For the cover 'fersfex' (picture below) get it from the hardware store or from any posters and signage company. If you are lucky you may get it for free..............
Here you are the DIY light box.....................it cost under RM180.00. Cheap, simple and practical.
*****AFTER TRYING A FEW TIMEs WITH THE LIGHT BOX, I FOUND OUT THAT THERE IS A WEAKNESS. THE LIGHT FROM TUBE TYPE FLOURESCENT BULD THAT I USED WAS NOT EVENLY DISTRIBUTED. TO RECTIFY THE PROBLEM I CHANGED TO THE 'RING' TYPE FLOURESCENT BULB, IT WORKS BETTER.
The DIY light box.............
Shopping around to look for a camera accessories and photography gadgets, make your eyes popped out. The prices are crazily expensive, a simple tent box cost RM300.00 at the Digi Mall and a price of light box...you just cant imagined. So, I decided to do my own and turn to the DIY................a light box and a tent box, cheap, simple and practical. Probably in my next posting I will show how I made this photography gadgets. As for now do enjoy some of the pictures that I shot using the light box I made it myself.
Tuesday, January 19, 2010
Food Styling Class - No. 2
The food styling class for this week is about presenting and styling a pan cake. It is a simple task, however it need some creativity. So, for this task the first thing that you need to do is to prepare or cook a pancake. A good, fluffy golden brown pancake that will make it more tempting in a picture. Some garnishing, fruit will be suitable such as strawberry, bluberry,pineapple and etc. What else should accompany a pancake in a plate? Yes, syrup, maple syrup - a thicken maple syrup and a touch of green - a sprig of mint leave. Oh not to forget the butter (portion butter), jam if you want and a snow powder (icing sugar).
Assembling a pancake: please make sure which angle of the pancake you want it to be seen in front a camera. Position the most 'sexiest' part of you pancake to the camera. Glaze your fruit, strawberry, bluberry and others so it does not look dull and dry in a picture (you may glaze them with a sugar syrup). The mint leaf too need to be spray with some clear thicken liquid to give a fresher look (mixture of clear corn syrup with water) . Maple syrup you need to thicken them, so it does not look flat on the pancake. pancake will easily absord thin syrup and this will make them look soggy easily. For that matter use honey with some brown coloring to give a darker effect - honey has thicker texture. It will stick and give body when pour onto pancake, it does not easily run flat.
You can add hight or body to the pancake by using aluminum foil. It is also used to give the pancake a even surface, so once the sauce is pour onto it, it will not be easily drip off.
Before pouring the syrup, do a dry run to get a good composition. Once you satisfy with the styling and composition, then only you pour the syrup for the final and real shot.
........to give a warm effect, heat up a pallet knife and slip it under the butter.
Subscribe to:
Posts (Atom)